Quick answers to frequently asked questions about our services
Find out more about websites, online shops, web hosting, Microsoft 365, maintenance, security and working with Milcraft.
The questions can be filtered by topic. Open a question to view the full answer. If your question isn’t listed, you can contact us directly via the chat.
Find questions about the service that’s relevant to you more quickly.
A practical explanation without complicated technical terms.
If you’re having trouble, you can ask your question straight away via the chat.
Answers by topic
Latest news
How quickly can Milcraft help me?
That depends on your enquiry and the service you’ve chosen. You can use the chat function to explain exactly what you need help with.
Design & management
WordPress & VPS
Personal contact
Open the chat and ask Milcraft your question straight away.
This is how it works
Filter, open and read the full answer straight away
The FAQ is automatically populated with all published questions. New questions and answers therefore appear immediately in the same overview.
All questions
Frequently asked questions by topic
Use the filters to find the right topic more quickly. Then click on a question to view the answer.
We use several layers of security and caching (Redis, AccelerateWP, Imunify360, ModSecurity and AIOS Premium). Sometimes this, combined with failures, delays or blockages, can prevent you from reaching your site. Follow the steps below to fix the problem:
- Empty website cache
- Login to your website if this still works. If not skip point 4 completely.
- AccelerateWP
In your WordPress dashboard (see image below), go to AccelerateWP →Empty Cache. - Check that the front page is now visible. Open the page again or reload it.
- Object Cache (Redis)
Go to Object Cache (Redis) (see image below) →Empty cache.
- Check the status of our services
Go to https://www.milcraft.nl/status/ to see if there are any (maintenance) failures. - Use another device or network
Try accessing the site on another computer, phone or via another network (e.g. mobile internet) to rule out local problems.
You can also use the handy tool at https://www.milcraft.nl/status/ at "Is my website online?" use. - Wrong login attempts or firewall blocking
Multiple failed login attempts or suspicious actions may have your IP temporarily blocked by AIOS, Imunify360 or ModSecurity. Please wait 10-15 minutes or contact them to unblock your IP. - Get in touch
Still not working? Send us a screenshot of your error message or the exact URL, and we will help you further.
Briefly: first check our status page, test another device or network and take into account possible blocking by security layers. In case of persistent problems, we are ready to help you further.
Step 1: Install the app
- Go to the App Store (iPhone) or Google Play Store (Android)
- Search for Microsoft Authenticator
- Download and install the app
Step 2: Go to your security settings
- Open a browser and go to: https://aka.ms/mfasetup
- Sign in with your Microsoft 365 work or school account
- Click on Next
Step 3: Link your account to the app
- Choose ‘Mobile app’ as verification method
- Select ‘Receive notifications for verification’
- Click on Settings
Step 4: scanning the QR code
- Open the Microsoft Authenticator app
- Tap ‘+ Add account’
- Choose ‘Work or school account’
- Choose ‘Scan QR code’
- Scan the QR code
Step 5: Verification testing
- Click Next on your computer
- Approve the notification on your phone
Step 6: Additional security option
- Add a phone number
- Choose SMS or phone call
Step 7: Finalising
- Click on Done
- MFA is now active
On our servers, we use several caching layers (including AccelerateWP and Redis). As a result, certain changes (especially to widgets, menus or other dynamic components) may not be immediately visible.
Briefly: caching makes your site faster, but can temporarily hide your latest changes. Emptying website cache almost always solves this.
Follow the steps below to make your change visible quickly:
- Website emptying
- AccelerateWP
In your WordPress dashboard (see image below), go to AccelerateWP →Empty Cache. - Check that the customisation is now visible. Open the page again or reload it.
- Object Cache (Redis)
Go to Object Cache (Redis) (see image below) →Empty cache.
- AccelerateWP
Still not working?
- Hard refresh in your browser
PressCtrl + F5(Windows) orCmd + Shift + R(macOS). - Empty browser cache
Go to your browser settings → Privacy & security → Clear browsing data → check 'Cached images and files' → click 'Clear data'. - Just wait and see
Sometimes the cache automatically refreshes after 5-10 minutes due to the set TTL (Time To Live). - Check in a private window or other browser
Open an incognito window or switch browsers to exclude local cache. - Get in touch
Still not working? Send us a screenshot or the exact URL, and we'll help you out.
Herewith a guide to connecting WordPress email via Office 365 through an app registration in Azure i..c.w. the WordPress plugin Fluent SMTP. Much of the manual works the same with the plugin WP Mail SMTP Pro. With WP Mail SMTP, you need the Pro version to make this connection.
The app registration connector is the successor to the default connector that can be set up in Office 365.
1. Download and install Fluent SMTP
2. Go to settings/setting from Fluent SMTP
3. When importing old data, select "Skip”
4. Choose from the services for Microsoft
5. At from e-mail choose the e-mail address, e.g. info@milcraftappvoorbeeld.nl
6. Under from name, choose the name the recipient should see when a new mail is sent, e.g. "Tom van Miltenburg | Milcraft”
7. Copy the callback at "App callback URL (Use this URL for your APP)“.
For the website https://www.milcraftappvoorbeeld.nl is this https://www.milcraftappvoorbeeld.nl/wp-json/fluent-smtp/outlook_callback
8. Now we make the Application client ID and the Application client secret.
Open in a new tab naat https://portal.azure.com. Log in here using your office login details, so in this example info@milcraftappvoorbeeld.nl with mailbox password.
9. In the search bar, type "App registrations”
10. At the top left, press "New registration”
11. Under name, enter a display name. Only you-you see this in Azure.
12. Choose "Accounts in each organisational directory (each Microsoft Entra ID tenant: multiple tenants) and personal Microsoft accounts (e.g. Skype, Xbox)”
13. At "Diversion-URI (optional)" for "Web" and place the previously copied callback url from step 7 here.
14. Press "Register“.
15. Copy the string behind "Application ID (client ID)" and matches it to Fluent SMTP in the field "Application client ID”
16. Go to the Azure tab again and open the "Certificates and secrets" and press "+New client secret“.
17. Under description, enter your own description. Only you will see this.
18. Choose a period. Bear in mind that you will have to create a new one after that period and put it in your diary in advance. This is because it won't work after that.
19. Copy the string under "Value" and matched it in Fluent SMTP at "Application client secret" and press the button "Authenticate & get access token”
20. A Access Code generated. Copy the entire code and paste it into Fluent SMTP under "Access code“.
21. Press "Save connection settings”
22. In Fluent SMTP, go to the tab "E-mail test" and send a test mail. We use mail-tester.com
Customer of Milcraft (or become :)) and need help setting up? Let us know!
If at your website login screen you press "forgot password?" then you can enter the mail address of your user account and press "Create new password" print.
The WordPress login screen is usually found at domain/wp-login.php, so for example https://www.jouwdomeinnaam.nl/wp-login.php,
You will receive a link in the mail to recreate the password.
If you press this link, you can enter a new password. This may also be the suggested password, but you can also change it. Do use a unique and hard-to-remember password. Especially for admin/administrator accounts, this is strongly recommended.
Then press the blue button below this field that reads "Reset password" to confirm the password. You can do this operation as many times as you like.
Have you completely locked yourself out by not being able to access your mail either? The password and mail address can also be changed via the database if necessary. Of course, we can also help with that.

You can contact us in the following way
By phone
Calling us is of course possible. This number is 0172-897789
It can be found under the rocket button at the bottom right of the website.
If we manage your website(s), it is only by agreement after we turn it back on.
The install option is off by default for management reasons. If we were to leave it on, there would be no control and we would not be able to see where plugins come from. We are happy to install plugins for you.
Milcraft supports both POP3 and IMAP for email. Which is the best option for you depends on a number of factors:
- the size of your mailbox
- the number of devices on which you want to receive e-mail
- the type of devices on which you want to receive e-mail
- the number of folders in your mailbox
In most cases, you choose IMAP.
Of course, you can use Roundcube-webmail, but you can also set up e-mail in well-known e-mail applications such as Outlook, Thunderbird, Windows Mail or the default apps on your Mac, iPhone or iPad.
You will need the following details for this: your username and your password. You will receive these from us after the installation of your services.
By default, we provide you with a strong password for your mailbox. We recommend that you keep this or choose a similar strong password. You can change your password in Roundcube via Settings > Password.
In your e-mail programme, enter the following settings. You can choose between secured and unsecured connections. Below are the settings for secure email:
IMAP settings
Incoming mail
Server: hosting[herenummervandeserver].mooijwerkt.nl, e.g. hosting1.mooijwerkt.nl
(This is in your welcome e-mail; if you don't know, feel free to call or e-mail us).
Port: 993
Security: SSL
Outgoing mail
Server: hosting[herenummervandeserver].mooijwerkt.nl, e.g. hosting1.mooijwerkt.nl
Port: 587
Security: StartTLS or TLS
For both incoming and outgoing mail, tick the password verification option.
Enter your full e-mail address and password here.
On first connection, your programme will ask if you trust the certificate/server. You can just accept this.
Although the standard webmail works fine, we recommend for intensive use, large folder structures or large mailboxes Office 365 to.
Benefits include 50GB of storage and seamless integration with Office products such as Outlook.
Want to know more about Office 365 or have questions about setting up your email? Then feel free to get in touch via the customer panel or call us on 0172-897789.
By default, Milcraft gives you access to webmail. This webmail runs on Roundcube and can be accessed at the URL: http://www.yourdomainname.co.uk/roundcube.
Login
You can log in by entering your full e-mail address and password on the login screen.
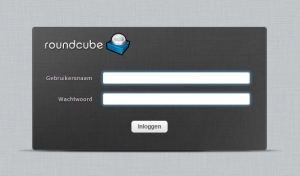
Roundcube webmail login screen
When you switched to Milcraft, you received a very strong password. We recommend that you use this for the security of your mailbox. Change this password regularly for a new one. We recommend doing this every three months. Choose a new password of similar strength.
A handy tool for keeping track of many and long passwords is KeePass.
Should you still wish to replace the password, you can do so in Roundcube at settings > password. Keep in mind that if you change the password in Roundcube, it will also change for your mail client on your PC, laptop, tablet and/or phone....
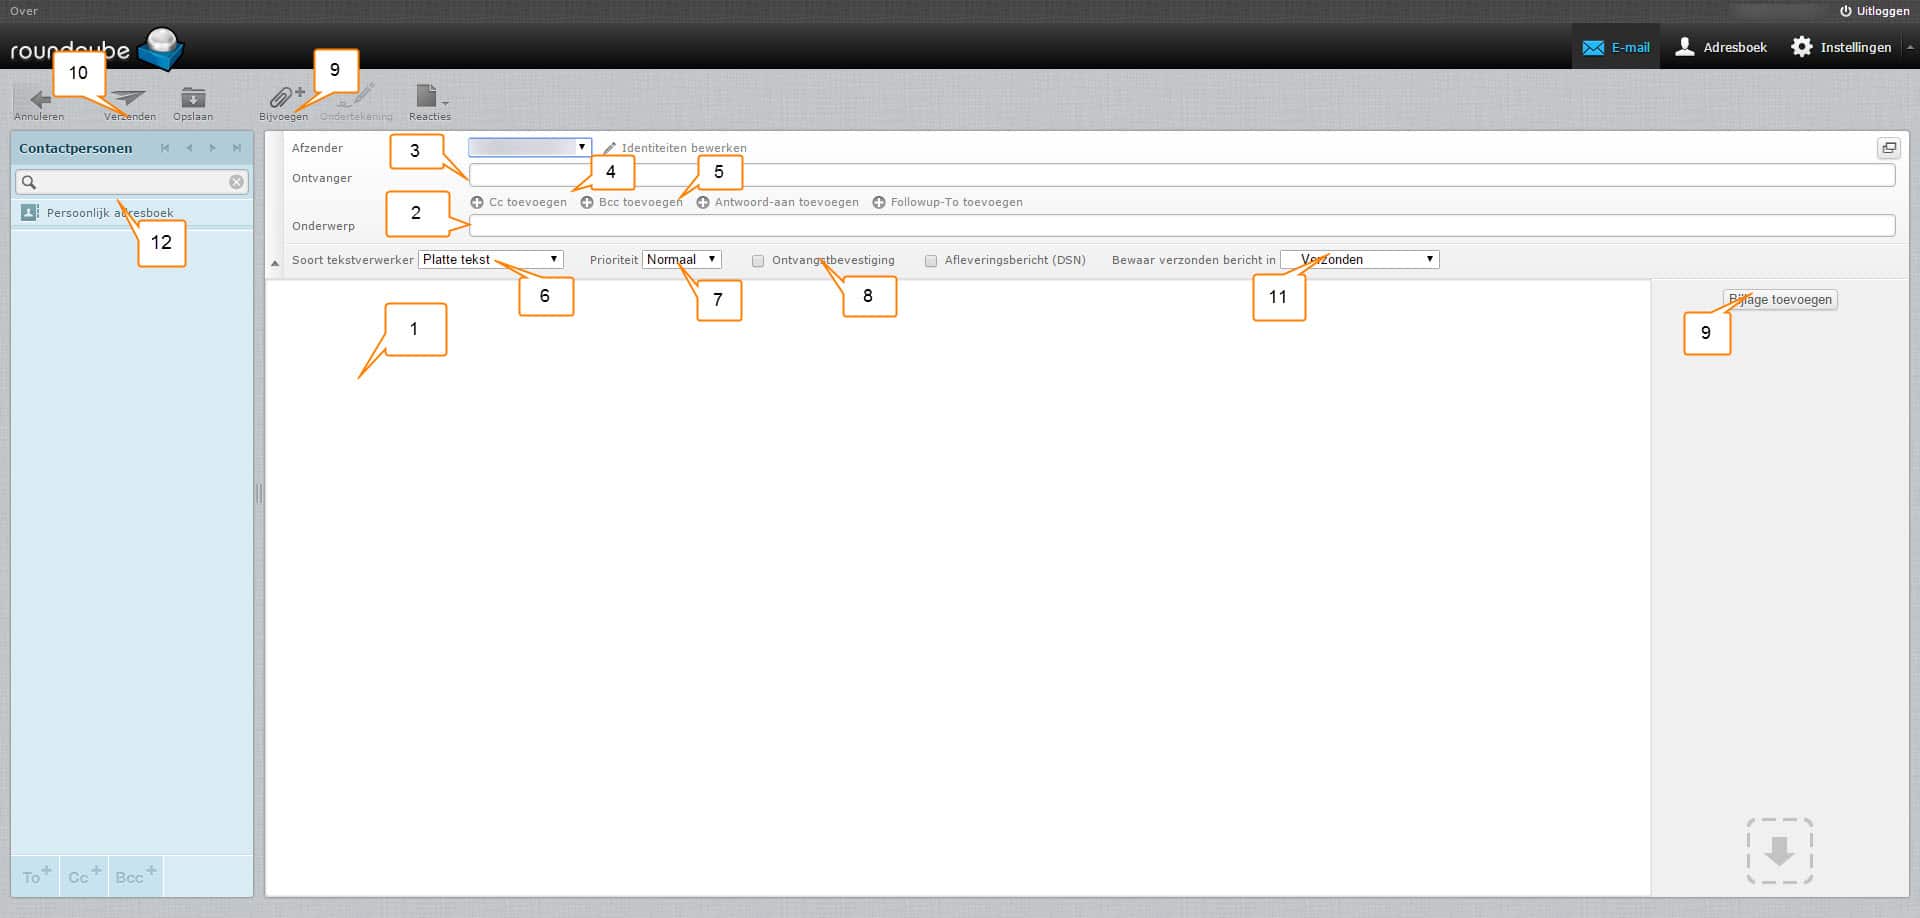
Roundcube basic functions
Below is a screenshot of Roundcube's main screen. You will see this immediately after logging in.

- Overview of your mails. You can sort them by date and sender, among others, by pressing date or sender above the column.
- Inbox: This is the main folder of your mail. All mail arrives here.
- Compose: Sets up a new e-mail.
- Junk E-mail: This is where all mail marked as junk by the spam filter ends up. Look in here regularly because "good" mails can also end up in there.
- Search: Here you can search all mails.
- Address book: Here you can store mail addresses and mailing lists. Keep in mind that this is a different address book than in, for example, Outlook. It is possible to import e-mail addresses into Roundcube.
- Settings: Here you can adjust your password, create folder structures and language settings, among other things.
- Marking: Here you can mark mail as read and unread, among other things.
Create and send e-mail
Mail formatting is much like the default editor in WordPress and Word. Below is a screenshot showing basic features.
- The area where the text of the mail can be placed
- The subject of the mail
- Recipient: Insert full e-mail address here
- C.c.: Here you enter the e-mail addresses of people you want to send a copy of the mail. The recipient will see that you are sending these people a copy.
- B.c.c.: Here you enter the e-mail addresses of people you want to send a copy of the mail. The recipient will see not That you send a copy to these persons.
- Here you can choose between Plain Text and HTML. In short, plain text without formatting and HTML with formatting.
- Here you can enter the priority of the mail in question. If it is a mail with default priority you can leave it unchanged.
- You can tick this to receive an acknowledgement of receipt.
- The button allows you to add an attachment. Think of a photo or pdf file.
- Use this button to send the mail.
- Here you select which folder the mail should be moved to after sending. You select this before pressing send.
- Here you can select a contact or mailing list you want to send the mail to.
Should you have further questions, you can ask them via the ticket system of the ticketing system or phone number 0172-897789
Changes can be sent via info@milcraft.nl. This can only be done by authorised persons with a mail address known to us.
This is possible. In the case of an upgrade, the costs are settled. With a downgrade, this does not happen.
Therefore, request a downgrade only at the end of your contract period.
Any more questions?
Can’t find the answer you’re looking for in the list?
Let us know via the chat what you’re struggling with. We’d be happy to help you with websites, online shops, hosting, email and technical management.